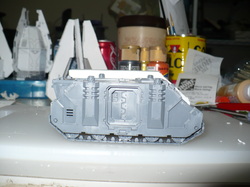
An earlier venture. After having some whining with the guys I was playing with, I let them tell me the dimensions a Rhino occupied and I built to them. So, it is a bit higher and wider than a GW model, but they could be lived with although if I make any more, I'll be leaving one thickness of posterboard off each side. Also, I haven't pasted any printed bits on yet, so they are a bit bland. I also have some turrets to do counts as for Whirlwind, Immolator, Exorcist (FW version) and Predator, but they are over at someone's house. 
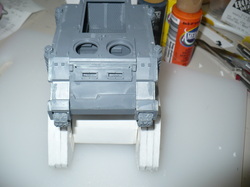
Without any of the added artwork, it is a little hard to see the slope on the front.
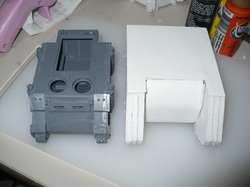
Side by side, early proxy Rhino vs the official one.
Even counting for the smoke stacks, it is still a bit wide for a Rhino.
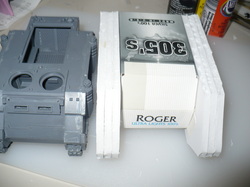
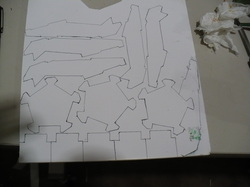
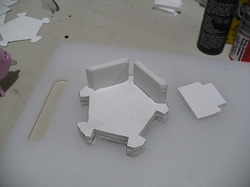
You have to love recycling. This is before the card stock paper cover gets on it.
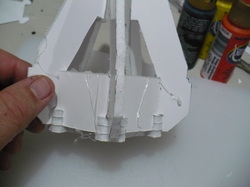
The length was correct, although my STC has a straight back door to jump out of instead of a slanted wimp's ramp.
Nope, the height is wrong too, like the width was when someone else measured one. Oh well, 1 out of 3 ain' bad, right?
As per a request, here is how I put together the pods.
NOTE: These were done to be fairly simple and serviceable. They have room for improvement as they are (see below), but I was not trying for uber precision cuts or lines, so if you want to mention I cannot cut or draw straight, I'll just agree with you.
Starting off is my bit of posterboard with everything there: 5x Door Bottom, 3x Pod Base and 5x Upright. This method would be doable with a Forgeworld Dreadnought Pod if I had one available. The patterns were nothing more than my laying the appropriate parts of a GW Pod kit and drawing what I needed.
Why white board? Because if I want it colored I can spray paint it whatever I want White makes it easy to see the marks for cutting. Oh, it also would cost me more to buy black posterboard than to spritz some paint...
As you can see, I use glue stick for the base. Quick and easy, nice for flat surfaces. Just use a bit of wait and let it set for a while. For me, a few hours, especially since I do this just after I finish cutting out a pod...
While I wait, I trim the doors, about a 45 cut with the wide side being the outside of the door. Precision isn't real important since I can always back fill with hot glue.
Here we go with the assembly. Simply glue on two of the doors with some hot glue (or Elmers if you want). I use hot glue because despite its annoying features, it flows easily when warm to fill cracks, sets quickly and holds well.
Next, a touch of glue on the upright where it will bond to the top and side of the base, hold it in place, then fill in to provide support for the door and the upright. Like I said, I like hot glue for this.
Next, just add another door and another upright until you get all the way around.
Messy hot glue work or the start of a Nurgle pod?
Don't forget to clean up strings. Well, maybe you could add strings if you wanted a Chaos pod...
Notice the uneven spacing around the top (the top itself is level). Mainly caused by low precision on the drawing of the pattern and cutting it later. However, with the flexibility in posterboard, I can probably straighten most of that up when I add in the top part of the door, especially if I trim each one individually. Yes, if you look close, there is a small puddle of glue down there. Not only helps with the support, it also gives it a little more bottom weight for stability....(well, that's a good excuse for being an autofire hot gluer...)
I still thought it was funny when I asked if anyone minded me using proxy pods, got a hand wave & "sure, whatever" type response and then "wow" when I didn't pull up a soda can for a pod.